Active@ UNDELETE Ver 5.0
See documentation for latest version
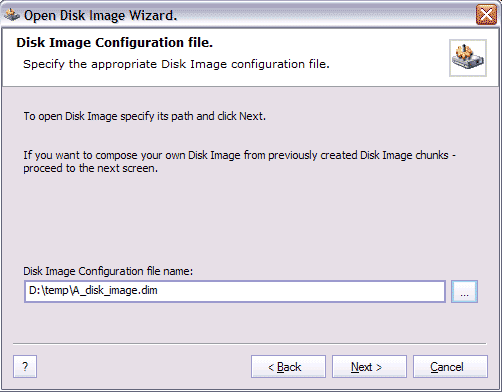
Using this wizard you can open previously created Disk Image.
On this step, you can enter Configuration File name to be open

You can skip this step by clicking Next button to ignore configuration file information and compose disk image manually on Step 2 screen.
Click Browse button to open Browse for File dialog.
Click Next button to continue.
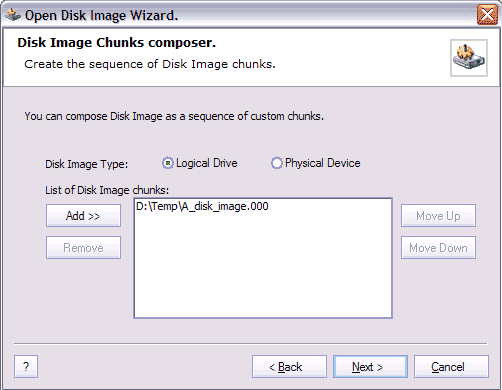
On this screen you can compose disk image by specifying Disk Image chunks and type of the image.

If you opening Disk Image by using Disk Image configuration file you will be able to see the list of image body chunks and the type of disk image you opening (Logical Drive or Physical Disk). Otherwise, you should specify manually the disk image chunks and its type.
To Add Disk image chunk, click Add button and select disk image chunk file from browsing dialog.
You can remove any disk image chunk by selecting it in the list and then clicking the Remove button.
You can modify order of disk image chunks. To do that, select one of the disk image chunk in the list and click Up or Down button to let move the disk image chunk selected in desired position.
Click Next button to continue.
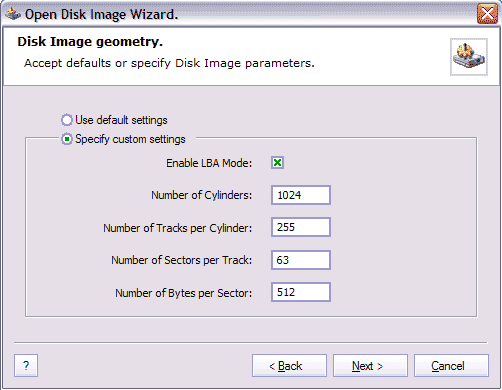
On this screen, you can specify the opening Disk Image geometry.

Disk Image geometry settings are only applicable for Physical Device disk images.
To use default values select Use Default settings. To set own values, select Specify Custom settings and enter your values of disk geometry in appropriate fields.
Click Next button to continue.
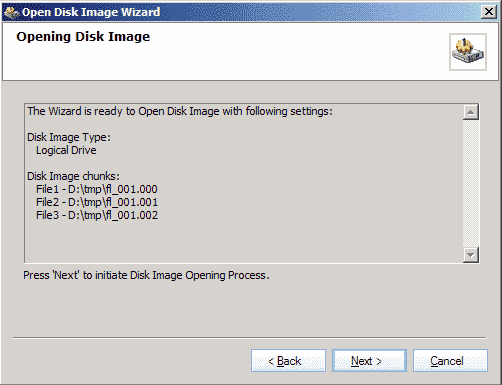
On this screen you can verify information about the opening Disk Image.

Click Back button to change settings or click Next button to open image.
If Disk Image creates, you will see complete screen. The opened Disk Image appears as Logical drive or Physical device, depending on type of Disk Image, in appropriate Active@ UNDELETE Explorer Tree.