Create a disk image wizard
This wizard guides you through simple steps to create a Disk Image of a data storage device or a logical drive.
A Disk Image is a single file or a series of files that stores all the data from your logical drive or physical device as a mirror image. Having a Disk Image can be useful when you want to back up the contents of the whole drive, and restore it or work with it later.
When the Create Disk Image Wizard starts for the first time, the first screen describes the process. Clear the Show this dialog next time? check box to avoid seeing this screen the next time you create a Disk Image.
To start the Create Disk Image Wizard, do one of the following:
- From the Wizards menu, click Create Disk Image
- Select Disk Image tab in the Command Bar and click Create Disk Image
Select imaging area
Select a data storage device in the hierarchical device/partition tree and select
the desired device area if necessary.
By clicking on a partition item in the device map, control of the entire partition area will be selected.
Set Disk Image attributes
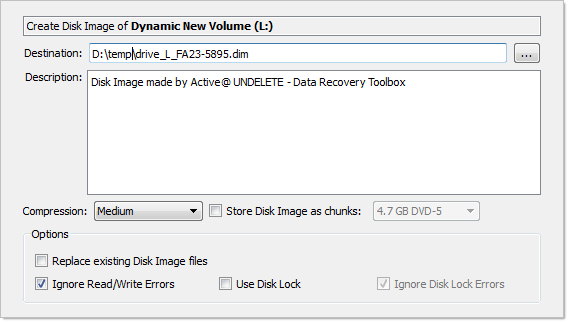
Page Options
- Destination Path
- The full path for the single Disk Image file. If you decide to store the Disk
Image file in chunks, this path will be used to store all files. You have the option
to use the default path, enter a new path or click Browse and navigate to the
folder that will store the Disk Image.
- Description
- Enter a detailed description of the Disk Image you are about to create.
- Compression
- Choose one of the following:
- None [Raw Data] - No compression is applied, sectors are stored in raw
format.
- Fast - Sectors are compressed before storing to the file using a fast
compression algorithm.
- Medium - Sectors are compressed before storing to the file using a slow
but more effective compression algorithm.
- High - High level of compression;
- Highest - Highest possible compression level ill be used;
- Store Disk Image as chunks:
- Select this check box to save the Disk Image as a series of files with a
specified size. Choose the file size from the drop-down list. This option may be
useful if you want to write the Disk Image to CD-ROMs or DVD-ROMs. By default this
check box is cleared and the Disk Image is stored in one large file;
- Ignore R/W Errors
- Any Read or Write errors will be ignored and process will continue if
possible;
- Use Disk Lock
- Source disk will be locked until Disk Image creation is complete or aborted;
- Ignore Disk Lock Errors
- Any errors related to disk lock will be ignored;
Confirm actions
Review and confirm the disk image parameters and click the Create Disk Image button to start the disk image creation process. While the process is in progress, you can stop it at any time by clicking Stop at the bottom of the screen.
Complete
Click Finish to close the wizard when the disk image creation is complete.
Result
You can work with a disk image in the same way as you work with a regular storage
device orlogical drive. You can:
- Scan it as a device for deleted or damaged partitions.
- Scan logical drives and search for files.
- Recover or copy files and folders to another safe location.