Active@ UNDELETE ver. 7x
See documentation for latest version
Scan a logical drive — quick scan
Quick Scan results are displayed in folders under the scanned drive node in Recovery Explorer and, optionally, in Document View. To Quick Scan a logical drive:
- In the Recovery Explorer tree pane or in the list pane, select a logical drive.
- To open the Scan Logical Drive dialog box, do one of the following:
- From the Recovery Explorer toolbar, click Default Scan.
- Right-click the selected logical drive and click Scan from the context menu.

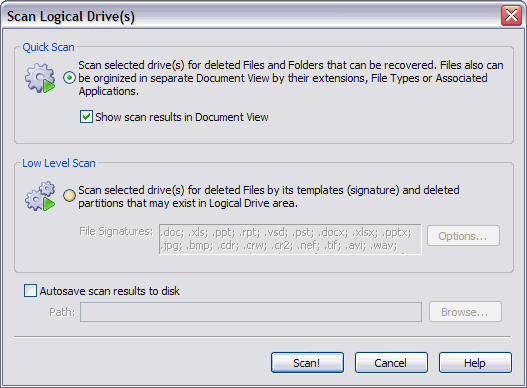
- Choose Quick Scan.
- To collect scan results in the Document View, select the Show scan results in Document View check box.
- Click Scan! The Processing… dialog box appears.
- To display scanning events and progress details, click Details.
- To terminate the scan process, click Stop at any time. Results may be not accurate
or complete.
- After the scan completes, if you chose to show scan results in the Document View,
the Document View appears.
- To view hierarchical folders under the scanned drive node, select the My Computer
tab. The Recovery Explorer view appears. The node label for the logical drive that
was scanned is emphasized in bold.
For help with locating files in the Document View see Document View.
