Scanning logical drives is a required step for recovering files and folders. During the scan all deleted (and existing) file and folders are detected. The results of a logical drive scan are displayed in a separate tabbed views: Logical Drive Scan Result View. To initiate a scan of a logical drive:
1. Select volume (logical drive)
In the Recovery Explorer view select a volume (logical drive).
2. Open the Scan volumes dialog box:
From the Recovery Explorer toolbar, click Scan.
Right-click the selected logical drive and click Scan from the context menu.
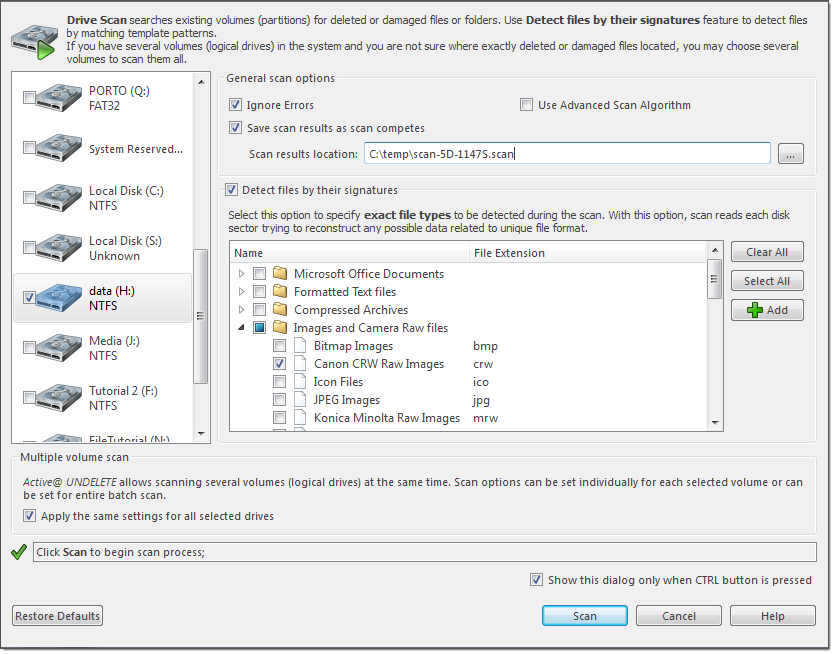
Dialog options
Multiple drive selection
Additional drives can be selected to scan on the Logical Drives list to be scanned simultaneously. At least one logical drive (volume) must be selected.
Ignore errors
Ignore Read and Write errors during the scan process.
Save scan results
If this option is on, a path must be specified where scan results with a unique name will be saved for each scanned drive. Provide valid path if you have this option selected.
Use Advanced Scan Algorithm
Select this option to apply advanced scan algorithm. However, event if scan results may contain more entries then with scan without this option overall scan process may take much more time.
Detect files by their signatures
Select this option to specify exact file types to be detected during the scan. With this option, device scan reads each disk sector trying to reconstruct any possible data related to unique file format.
Apply the same settings to all selected drives
All scan options above, can be selected for each drive individually or, when this check box is selected, to be the same for all selected logical drives.
3. Click Scan to initiate scan of selected logical drives (volumes) scan.
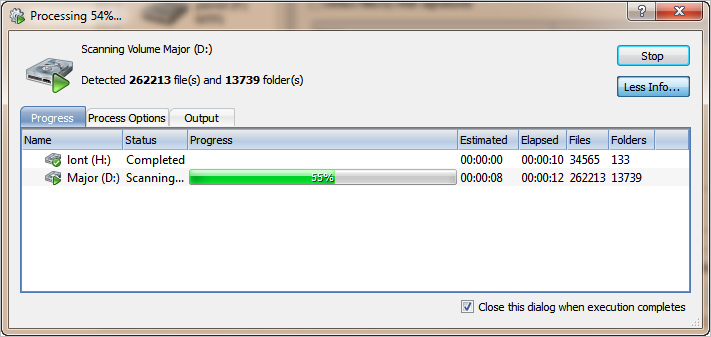
4. Scan selected volumes.
During the scan:
To display or hide scanning events and progress details toggle More\Less Info button at any time.
To terminate the scan process, click Stop at any time. Results may be not accurate or complete. After the scan completes you will see scan results in the Logical Drive Scan Result View.
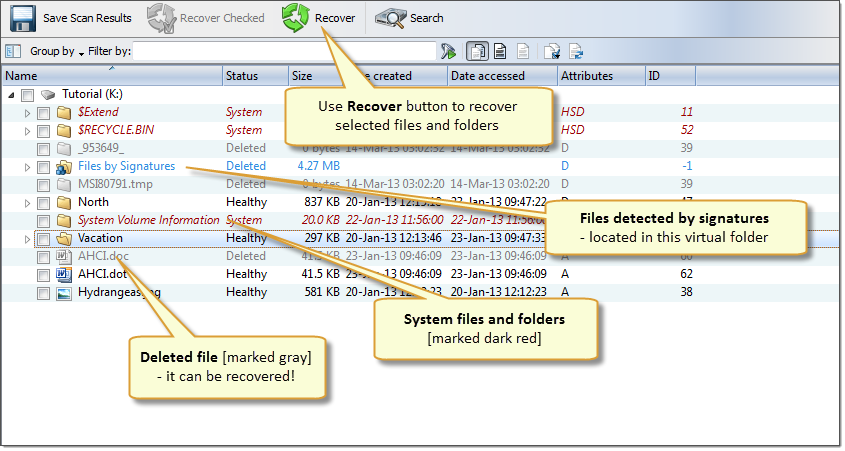
Review scan results
A Logical Drive scan result appears in the Logical Drive Scan Result View where results can be reviewed and files selected for recovery.
We recommend saving scan results to a designated location for later use - you can use saved scan results to save time on repeated scanning of the same volume.