You can open a physical disk, a logical drive, or a partition from the Recovery Explorer view on page 8. If you performed scanning, you can also open a file from the list of found files.
In Disk Editor you can view and edit following disk objects:
To open an object, do one of the following:
You can open a physical disk, a logical drive, or a partition from the Disk Browser. If you performed scanning, you can also open a file from the list of found files.
In Active@ Disk Editor you can view and edit following disk objects:
Tip: Use Ctrl+O keyboard shortcut at any time to bring Open in Disk Editor dialog.
Active@ Disk Editor can automatically detect plugged removable devices and shows them in File Browser.
However, if plugged device does not appear in click Refresh button in toolbar to update File Browser view or press and hold Ctrl button on keyboard and click Refresh button in toolbar to completely rescan and refresh all connected local data storages.
In Open in Disk Editor dialog use filter to adjust disk object list, select an item an click Open to continue.
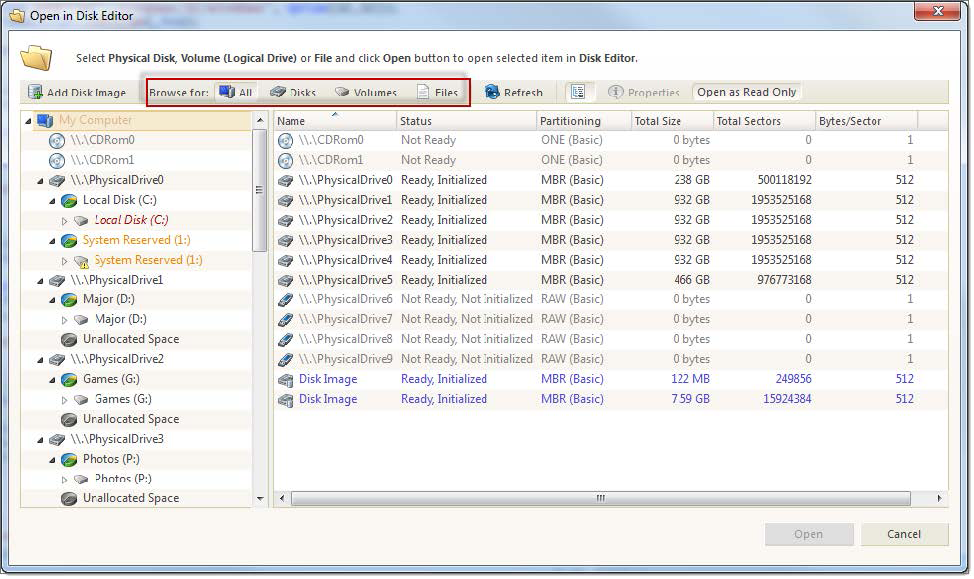
Figure 35: Open disk or volume in Disk Editor
Mount disk image made by one of the LSoft Technologies utilities, such as Active@ UNDELETE or by third party applications. When mounted, disk image content will be added to navigation tree and will be loaded automatically t next session.
See Open Disk Image for more information about Disk Image options and attributes.
Note: You can open (mount) disk image at any time separately by using File > Add Disk Image... from main menu.
Filters editable objects such as disks, volumes (logical drives), files or all disk objects at once for easier navigation.
Refreshes list of disks and their content. Could be useful while changing removable devices.
Show or hide navigation (tree) pane on a left side of the dialog.
Show or hides properties pane
Toggles default object read only state opened for editing
Open in Disk Editor dialog shows detailed information about the selected object in the property panel.
Warning: As with any advanced tool, use extreme caution with the Disk Editor. Changes that you make may affect disk structure integrity. You must be certain that the changes you make are in line with correct data structures before you save changes.