Active@ UNDELETE is an advanced data recovery tool designed to recover data lost or deleted data, or even information from formatted hard disks.
Logical drive (volume) scan results view displays all files detected after a logical drive scan.
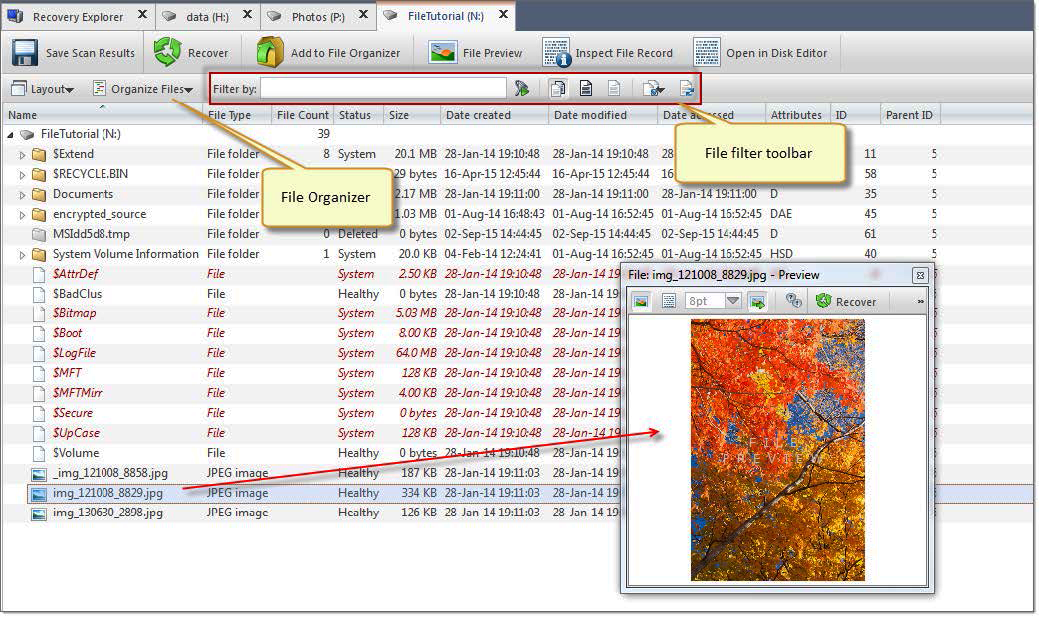
Figure 7: Volume scan result example
Show or hide left-sided navigation tree pane. To toggle this option use Layout > Drive Navigator menu from view's toolbar.
Use feature to group detected files by:
Read File Organizer for detailed information about grouping sets and customization.
This control is used to filter files in scan result. Read File filter toolbar control for usage information.
File preview is used to preview content and visually validate file before recovery File preview. To make scan results easier to read, you may do the following:
If volume contains too many files or location of required files is unknown use Search for deleted files and folders feature — more advanced way to find files by their attributes and name patterns then simple filtering of contents of a scan. Search results will be shown in separate tabbed view and files can be recovered directly from search result as well.
To initiate search select context folder or drive (to search through content of all volume) and either:
File Organizer can be used to collect files from different sources (scans) in one hierarchical collection and recovered in one batch applied the same recovering attributes for all selected file, like naming convention or file attributes.
1. Select files in scan results using CTRL and SHIFT keyboard keys for multiple selection and
Repeat these commands if necessary for the same or for different file sources (scan results).
Files in this view can be edited in advanced hexadecimal Disk Editor. To open file in Disk Editor:
To view file record click Inspect File Record button in toolbar or use:
Tip: It is recommended to save scan results for later use.
When you have found all files you looking for — proceed to Recover detected files